
Maintaining a clean home is very easy with a good mopping technique. It is needless to say that keeping the floor properly mopped reduces labor by a lot. On the other hand, doing it improperly may give you unbearable back pain and joint problems. Again, you may not get the perfect output all the time if you’re ignorant about how to mop the floor appropriately.
This is why I’m focused on some exceptional skills where you can learn about the proper mopping techniques. Here you also get the tips to make the floor mopping safe. So without any further ado, let us get started.
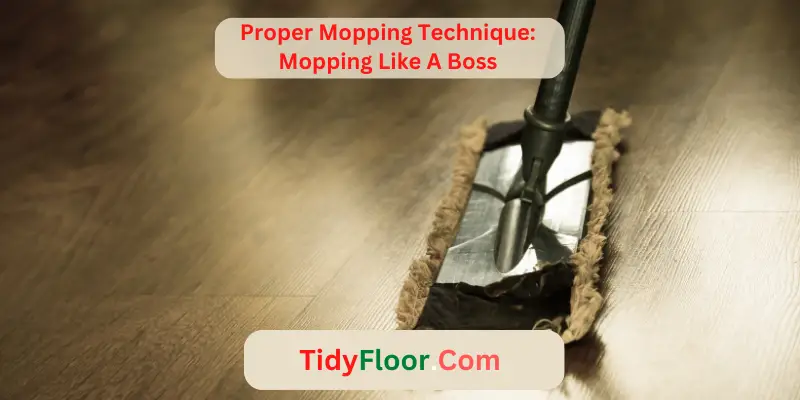
9 Easy Steps To Mop The Floor Properly: A Perfect Technique To Mop
Before mopping your floor, you need to be prepared. Here are some techniques you should follow before starting the job to get an even finish.
Step-1: Keep Aside All The Necessary Things
First, you should keep aside all the necessary furniture from the areas. You can keep the table, chair, or throw rugs aside and assign it to the areas where you don’t need to mop.
Remember that mopping is ongoing work that needs to be finished as steadily as possible. So while you’re starting to mop the floor, you may not like that your mop bristles will mess up with any particular objects.
Again, the furniture will also get some dirt, which is good to clean before the mop to prevent dirt. It will also help you clean the furniture and your mopping job.
Step-2: Sweep The Floor Before The Mop
Sweep the floor before starting the mop because mop brushes will not be able to pick up the dust, solid debris, and other particular crumbs. If you don’t clean the floor before beginning to mop, that dirt will stubbornly sit over the floor. So try to sweep the floor once. After that, prepare to mop the floor.
Step-3: Make A Cleaning Solution
Now make a cleaning solution. This will help you cure the dirt, unnecessary scratches, and debris on the floor. You should use warm water as it is constructive to remove the dark spots from the root.
For the solution, take a quarter of the water and add half the amount of cleaning solution. Stir the solutions and dip the rug in them. Leave it for a while to submerge the mop pad or mopping rug properly.
Step-4: Mop The Floor By Dividing It Into A Section
Mop the floor by dividing it into a section will make the job easier for you. You will need to mop the floor four to five times when a regular mop time may require more strokes.
In the meantime, use a mop bucket beside you. Try to keep it in a high place to mop the floor without hurting your back. Start to mop the floor in the kitchen, as this place is usually filthy and contains heavy grime.
You can use the vinegar solution and pour it all over the floor for this place. While it sits on the floor, start scrubbing it with the toothbrush. Then rinse the floor with an ordinary mop.
Step-5: Rinse & Wring The Mop At The Middle
It is a crucial part of this term. You should rinse and wring the mop after finishing one section. For instance, while you’re finished mopping the kitchen, try to rinse it once into the bucket. After that, go for the next stroke and mop the other room’s floor.
It is also appreciative not to bring the dirt from the other floor parts. Wringing the mop in the middle will be impressive to give you a clear mopping experience every time. Rinse the mop twice if your house floor is hardwood or porcelain.
Step-6: Change Your Cleaner Every Time
When you mop the floor, your cleaner will get visibly dark and dirty. If you mop the floor with them, there is a possibility of dirt remaining there. So it is wise to change the water whenever you notice the bucket water has become dirty. When you’re scrubbing your floors, you should use only clean water and solutions.
Step-7: Soak The Mop Properly
Whenever you clean the floor, make sure that you soak the mop properly, unless you can remove the dirt from the core. You may find dirt and wet, dark spots most of the time. So it is necessary to soak it in the water and rub it as much as possible.
Step-8: Stand In A Good Posture
Standing with a good posture during the mopping time is essential. In this way, you can manage to emit lots of debris, pet Moses at a time. Just hold the mop in your left hand and pick the handle on your right. Then drive the floor mop usually and try not to move your back too much.
Use your hand instead of moving your back and waist. It is a better option to use any long handle mopping brush, in which you can do the job without any trouble.
Step-9: Let The Floor Dry & Ensure The Good Ventilation
In this step, try to dry the floor and ensure good ventilation. You need to dry out the floor properly. Most people think of drying the floor by themselves like a hair-dryer or fan, and it may not be helpful even if the streaks are nasty.
In the meantime, open the door and windows to let the floor air dry. This way, you can dry it as early as possible. Finally, place the furniture which you keep aside once.
10 Tips To Make Your Floor Mopping Safer And Effective:
Without good mopping tips, you can’t beat any job appropriately. Similar things are also valid for these terms. However, follow these below tips to make your floor mopping safer and more effective.
Tip-1: Choose The Right Cleaner To Mop The Stubborn Dirt
A good cleaner is essential when mopping the floor. Because of this, you will most of the time feel that your floors are not clean enough. Some floor cleaners aren’t recommended to use on some particular surfaces.
So, it is your cordial responsibility to choose the right cleanser for your floor. Check the product manufacturer’s ingredients list and warnings to ensure that this is suitable to use over your home floor.
Tips-2: More Cleanser Or Soap Isn’t Worthy All Time
Usually, people apply too much cleanser and soap. But using more soap isn’t a good idea to mop the floor appropriately. The more soap you will use, the enormous dirt and debris will be messed up over the floor.
Most of the soap and cleanser will be made of surfactants. Those surfactants are the container of two crucial things known as hydrophobic tail and hydrophobic head. Those surfactants are the source of water-loving materials.
So, whenever you’re starting to mop the floor, the dirt will get saturated with soapy water. In that way, you can’t feel comfortable mopping the floor with more cleanser or soap. Try to use the appropriate amount of cleanser while doing the task.
Tips-3: Don’t Leave The Mop Without Rinse
One of the most significant issues of improper mopping is letting the mop run without rinsing or cleaning. You may use a lot of cleaners to make the job effective. But until you don’t change this habit, you won’t be able to meet your goal.
Using lots of cleansers or soap didn’t give you certainty about mopping the floor. Those dirty mops will bring all the dirt from your previous mopping job. So without cleaning the mop properly, the floor didn’t give you the expected shine.
You can soak the mop with warm water and dishwasher soap to deep cleanse it after finishing the mopping job. It will help you to get the expected results.
Tips-4: Don’t Forget To Increase The Rinse Time Of the Mop Pad
Increase your rinsing time instead of giving intervals while mopping the floor. It will be very costly for everyone to get an effective mop. Mopping with the constant dirty pads will not give you the perfect finish. Instead of getting the perfect mopping floor, the dirt will come back from the previous section, which you’ve finished sweeping recently.
Tips-5: Use Reusable Mop Pads Instead Of Disposable
Using reusable mop pads will allow you to finish the job more efficiently. On the other hand, most families couldn’t afford the disposable mopping pad as they were too expensive.
Another benefit of using reusable pads is that they are very easy to use and wash in the long run. You can wash them 300+ times at once, and many insist on more than this.
Important Note- It is worth using reusable pads for their super adequate capacity to kill the germs. But ensure that you clean them with 140 degrees Fahrenheit warm water. Avoid using bleach or fabric softener to save the pads’ fibers.
Tips-6: Make Home-Made Cleaner
Due to the acidity of many floor cleaners, it is safe to use homemade cleaners. To make the cleanser, you should use an excellent diluting ratio of vinegar and water. Take a cup of white vinegar and mix it with a gallon of water. You can use these solutions over the linoleum, tiles, and vinyl floors.
Tips-7: Follow The Two-Pass Rules To Be Finished Early
It isn’t expected of anyone to scrub and mop the floor all day long. So follow the two rules to finish your mopping job earlier.
Tips-8: Start From The Corner
Try to mop the floor by starting from the corner. It’s a formal rule of mopping. Otherwise, you might walk over the wet floor you’ve just finished scrubbing.
Starting to mop from anywhere neither gives you the comfort to finish it earlier nor does the dirt disappear. Similarly, your feet may get wet and grimy from this.
Tips-9: Use Steam Mop For Immaculate Grouts
Grouting is a speck of familiar dirt in the gap between two tiles. Many cleaning experts and sellers claim that their products can disinfect the dirt. But it’s not true in reality. You might not get satisfactory outputs from those regular cleaning services.
So my advice is to use any traditional steam mop to do the job perpendicularly. With the first attempt, you’ll experience outstanding results.
Tips-10: Use a Spray Mop To Increase Speed
Speed up your mopping process by using the spray mop. It will help you to complete the sweeping task rapidly. Spray mops are very lightweight and very practical for deep cleaning the floor with less effort.
Related Questions:
What Kind Of Mop Do Professionals Use?
Professionals usually use the Swiffer sweeper XL starter kit, Libman microfiber dust mop, Swiffer wet jet, etc. Another is known as the Bona hardwood floor mop, which is best for hardwood floors. Bissell spin-wave-powered floor mop is also a good option for professional use.
How Many Times Should You Mop The Floor In A Week?
You should mop the floor section-wise in a week. Divided the areas into some parts. Mop the high traffic areas like kitchen, bathroom, and hallways weekly. Try to mop the low traffic areas per day, such as the bedroom, dining room, etc. Make sure to clean the living areas and guest rooms monthly or weekly. Since those areas didn’t require any heavy dirt, it would be ok to clean once a month.
Is It Better To Mop With Hot Water Or Cold Water?
Hot or warm water can retain floor shine. In most cases, hot water effectively eradicates bacteria and germs. Again, cold water costs less electricity and saves you money. You will get a cooling effect after finishing your work. Cold water also works to reduce the home temperature.
How Do You Properly Mop A Floor?
Mopping the floor properly begins with getting it up. It will help you lose the dirt and wipe away any stickiness from the surfaces. Now start to mop around the edges first, then follow the overlapping norms. Select the area to mop first. Then run the mop over the surfaces. Rub the floor as much as you can. Rinse it in the middle of the work.
How Do You Mop Like A Professional?
To mop the floor like a professional, you won’t need to be strategic and skillful. If you’re hiring any professional cleaner, the only thing they might do is sweep the floor properly.
However, to mop like a professional, first, take a bucket of water and mix the regular cleanser with it. After that, finish your work by mopping the floor and washing away the dirt. Then rinse the floor with warm water. Use a heavy-duty scratch-removing cleaner to give a polished finish.
What Should You Not Do When Mopping?
Mopping the floor without refilling the bucket is a common mistake for anyone. Yet it returns the dirt for not changing the mop water in the middle. Another mistake you may make is to not wash the mop pad after every use.
Again, using the bleach on the steam mop tanks is also a big mistake that destroys it completely. Sweep the floor without soaking the pad and mop them with swirls which belong to this term too. Soaking the microfiber pad in hot or high-temperature water also pushes this trouble a lot.
Why Is Your Floor Still Dirty After Mopping?
Two common reasons are to blame for dirty floors after mopping. One of them mopped the floor with excessive soap and cleansers. The second one is using the dusty mop foam for a longer period.
Your floor still gets dirty from excessive use of soap, since they contain surfactants. Surfactants will not be able to clean the dirt rather than mess it up with lofty grime. Meanwhile, you should change the mopping pad whenever it gets dirty and unworthy of use.
Final Wrap:
Living with comfort and relaxation is tough without a clean and hygienic atmosphere. However, to get a privileged finish and deep clean, there is no bound to learn the proper mopping techniques. Maintain the right ratio of mop water to cleanser.
Change the dusty water frequently during the working period. And you can beat the task once you excel over it. Take my overall suggestions and advice from this article. Hope you may be able to finish the task righteously.