
A spongy boat with soft spots is dangerous. It fails you to get a firm foot grip, which can spread throughout the deck. Also, the look of the entire deck is ruins because of the spongy boat floor. Repairing these errors is necessary.
However, many people need to learn how to repair these damaged areas. Due to the lack of skill and information, they may end up making a mess. If you are one of those who are indecisive about spongy floor repair, you are in the right place. This article will discuss some fantastic tips for repairing porous boat floors. Also, the entire process of spongy boat floor repair will be explained.
People looking for guidance to repair their spongy and damaged boat floors go through this article once. From my hands-on experience, I have gathered the best way and tricks to repair a spongy floor.
Hang on and follow me!
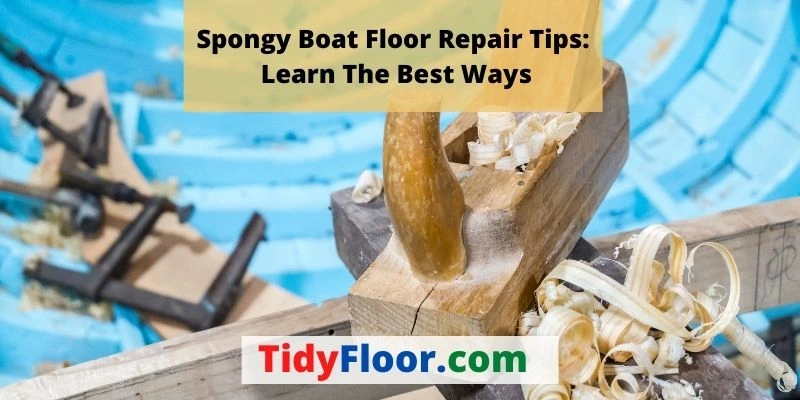
5 Spongy Boat Floor Repair Tips: What You Need to Know
First, you should know what a spongy boat floor is. Otherwise, it is different to ensure a proper boat flooring repair process. If you see the deck being spongy, you can also find a place where the boat is soft. Many a time, you may find the entire deck being spongy and soft. In that case, you have to replace the entire deck. But if you find a soft spot on the boat floor, you can repair it and get tight and strong boat flooring again.
Note that the spongy flooring is made because of the middle part between the fiberglass layers. It can be wooden or other material that goes in between the two fiberglass sheets. Between the sheets, there remains a layer that gets damaged or rotted. This is the reason why the boat flooring becomes bouncy. So you need to repair the soft spot only where the damage has been identified.
Now let’s come to the tips of repairing a spongy boat floor. Below are some tips that can make the repairing more efficient and fast:
Tip 1: Support The Deck
You must support the deck first before starting the project. As the deck is already spongy, the inner layer is quite fragile. So if you don’t add support, the deck can break or crack.
Also, it is easier to work for the entire deck with support. When the deck is stable, you uniformly spread the epoxy or putty on the flooring. The structure needs to be firm and stable to work on it properly. With a frame or support, you can fix the soft spot and closely look into the other parts of the deck.
Tip 2: Wear Safety Gear
You should wear safety gear before working on this project. You need to work with different chemicals like epoxy, glue, etc. They release toxic fumes and are harmful to your skin. You need protective gear to protect yourself.
Before working on this project, you should wear gloves and a face mask. Besides that, wear goggles to safeguard your eyes. Do this in a ventilated space so you don’t breathe in the fumes.
Tip 3: Make A List And Get The Necessary Things
Don’t start repairing the spongy boat floor out of the blue. You should get all the tools and materials, plan the project, and start with it. Also, collect the items long before you plan the project so you can get the things if you miss out on anything.
Items like the painting brush, filler, suitable epoxy, wood or materials, gel coating, etc., should be bought before you start the project. So make a list of what you need, buy them, and recheck whether you need anything.
Tip 4: Plan The Task And Be Cautious
Planning the project is essential to do the task efficiently. Create a time frame and then work on the boat deck. Before that, you should check the soft spot and see the areas you need to repair. On top of that, decide which material to use first and which one the next.
But what caution is needed? The caution is that you should not mix the epoxy and other materials before you start the project. These things harden very fast. This is why planning is needed. Mixing and applying should be accurately done for the best result. Thus you have to plan and prepare cautiously.
Tip 5: Cut The Deck And Inspect First
Before you start the project, you should inspect the area first. Cut the soft area a bit, and then you can understand how to repair it. You can use a filler to repair the damage if the problem is minor. On the contrary, if the problem is major, you need to cut open the deck and repair the soft area.
For instance, fiberglass delamination can be repaired easily without much hard work. Applying epoxy and replacing the damaged layer can help you get a new layer of fiberglass. So make holes to inspect the area first and then plan your project. Indeed, filling screw holes in the boat deck is going to be a tricky part.
4 Steps To Repair Spongy Boat Floor: Know The Best Way
Now that you have the best tips in your hand, how to fix a spongy floor? Repairing a porous boat floor is easier if you follow a certain path. From my knowledge, I have made a short step-by-step guide so that you know the basic mechanism.
So let me tell you the easy steps to repair a spongy boat floor:
Step 1: Identify and Cut Open The Soft Spot
The first task is to identify the soft spot that has to be repaired. You can knock on the surfaces, and a hollow sound would show that the area needs repairing. Mark this hollow area. Similarly, you may find several spots that are affected. Mark these areas too.
Once you have drilled the hole, you can insert a saw blade into it.Slowly insert the saw and cut open the affected areas.
Step 2: Wax And Dewax The Area
Pour a dewaxing solution into the holes you have drilled. Pour enough so that it pops out of the hole. Now grind through the hole to make a slope inside. There is a small calculation. For one inch of deck thickness, the slope would be 12 inches.
Then you have to wax the hole. To do that, take the flooring material, and cut it slightly bigger than the hole you have drilled. Now spray wax-like polyvinyl alcohol on one side and paste this side towards the hole using duct tape.
Step 3: Fill The Holes
Now is the turn to fill the holes with the fiberglass cloth. Cut the fiberglass clothing you need. For one inch of boat flooring thickness, 1/32 inch of fiberglass cloth is required. Cut ½ inch of fiberglass mat for each hole, and you need two layers of fiberglass cloth to cover the soft areas.
Step 4: Put The Finishing Layer
Now that the holes are filled, you must work on the entire deck. For that, use a mixture of gel coat resin and apply this with a brush on the areas you have applied wax previously. Now let the gel coat dry out on these surfaces.
Next, mix the hardener and epoxy resin and apply three layers of the solution on the fiberglass before it hardens. With a roller, press the fiberglass gently on the epoxy. Wait for 24 hours to let the fiberglass sheet settle on the flooring.
If the damage is minor, you can simply fill the hole with putty to cover the damaged or boat dry rot area. Also, if the entire middle area is damaged, you must replace the whole layer beneath the fiberglass rather than repairing the boat deck.
Cost To Fix Soft Spot In Boat Floor
Spongy boat flooring’s no-rot, great strength, and low-maintenance qualities have made it a valuable asset in the marine industry. However, there are situations in which these can be damaged to varying extents. Keep several things in mind as you get ready to fix the boat floor. In the end, the total cost of repairs will depend on the following factors:
1. Material
The cost of floor repairs will depend greatly on the material you use. The cost will vary based on the type of material being used. Products come in both more affordable and more costly tiers. The cost of fixing the floor will vary depending on which option users choose.
2. Expenses In Secondary Resources
When fixing the floor of the boat, there are certain auxiliary supplies like paints and sealants, screws & bolts, adhesives, etc. These necessary products come in various quality levels at different pricing points. The costs of these ancillary items will also affect your total repair cost.
3. Damaged Area
Repairing a boat’s floors expense depends on the extent of the damage, the number of areas that require fixing, and the type of damage that has occurred. It will cost less to repair minor faults that affect just a tiny section of the flooring.
However, if the damage is significant and covers a large flooring section, expect to shell out significantly more cash. Ultimately, the price will depend on how much time, effort, and resources you put into repairing the floor.
4. Product And Method Testing Expenses
Some items and processes are different from the boat. Thus you need to run testing procedures to determine this. These costs will increase if you require this testing.
5. Fee For Service
Many companies provide boat maintenance services and have skilled workers on staff. These businesses offer quotations for a wide range of tasks, with costs typically covering everything from the price of all materials to the cost of their specialists’ labor. The trouble is that prices will change from one company to the other.
Continue your search for a more reasonable offer by evaluating competing bids. If you can’t find an affordable price when comparing this deal to others, keep exploring. The expense of hiring professionals to fix the boat’s floor can be avoided if you can do the job yourself.
What is the approximate price?
- Expert Maintenance
An hourly rate of $70 to $110 is typical for having a professional fix the floor of a boat. The range accounts for the cost of labor and any necessary specialized equipment. Here’s an estimated final price using that range: $70 – $400. This would include the expense of repairing a few minor issues, such as tiny holes or cracks. However, the cost of replacing the deck of a boat might easily exceed several thousand dollars.
The extent of the damage to the flooring will determine the final price. Prices can rise to $350/hr if more time and supplies are required to complete the repair. The quality level is another deciding aspect. More money will be spent over time if premium components are used. For instance, if you need your floor fixed, you may pay up to $450 per hour for a fiberglass and epoxy service or a two-part polyester resin like Gelcoat.
- A DIY Approach
To do the repair job independently, you must ensure easy access to all the necessary supplies and tools. Several processing instruments will be required, including sandpaper, a sanding block, a spray tool, a rotary tool, a heat gun, a burr nose grinder bit, a stir stick, and safety gear.
You’ll need finishes like epoxy or polyester resin with a hardener, which will run you about $39 for that much labor. So, expect to spend between $50 and $70 for a typical small repair.
What Causes Soft Spots On The Floor?
Even if it appears insignificant, an area of softness on the floor of the boat demands rapid attention. If a soft spot is contained to a small area, it will not only be considerably simpler to fix, but it also has the potential to become far more dangerous for everyone currently on board.
The following are some potential reasons for soft areas on the boat’s floor: Having this knowledge will make it easier for you to avoid causing any extra harm!
1. Compression
In most cases, the compression of the foam that lies beneath the fiberglass deck brings a soft area. In most cases, the fiberglass will return to its original position, but the foam will continue to be squeezed.
There are a few different ways that soft spots can be caused. The most prevalent cause is the individual’s body weight repeatedly moving up and down in the exact location. The specific location where something like this can occur is just in front of the back crossbar.
2. Not Sitting On The Tramp
Sitting on the trampoline as much as possible is recommended to reduce the risk of developing a soft spot. Avoid bouncing around too much if you’re seated on the deck between the well and the rear crossbar.
3. Dropping Something
The mast, a tree limb, or even a hefty ice chest might fall onto the deck and create a soft place. This is yet another method for acquiring a soft area on the deck. When this occurs. However, the inside layers of the fiberglass decking may have broken, which results in the deck having a mushy or spongy sensation.
Instead of walking on the middle of the deck, have your passengers walk on the textured non-skid. This will help prevent them from slipping and falling. The deck’s borders are considerably more robust than its middle portion.
4. Sun and Extra Pressure
Over time, the sun degrades the foam. The water dilutes the resin, obese people with boney butts sit in the same area, “friends” go up and down the bows, and children believe it’s great fun to jump on their father’s boat at the beach or in the water, resulting in soft patches.
5. Water
Most soft patches are caused by water in between the glass. The foam takes in the water and stores it, but as the temperature drops, the water freezes and expands, ripping the glass away from the foam. When heated, water transforms into vapor, expanding between both layers and producing the same effect.
As soon as the contact between the glass and foam has begun, it will gradually pull apart. The impact will result in the creation of little soft patches, but more often, even a minor impact will break the glass, enabling water to enter, which is the source of the problem.
6. Exterior glass skin
After ten thousand heating and cooling cycles, the link between the foam and the inner glass skin ultimately fails because the outer glass skin warms and expands faster than the foam and the inside skin. The Redlines’ and newer boats both employ foam, which improves the resin’s ability to penetrate and cling to the surface.
It begins to form first in the deck area that receives the most direct sunlight and is the deck’s widest and most unstructured part. This is also where people stand, although standing there only physically separates a relationship that has already collapsed.
How To Fix Soft Spot In Fiberglass Boat Floor
To fix a soft spot in a fiberglass boat floor, follow these steps. First, identify the soft area by tapping the floor with a mallet, as it will produce a hollow sound where the damage exists.Next, drill small holes around the soft spot to relieve pressure and allow the area to dry.
Once that’s done, remove the damaged material by cutting out the soft or rotted fiberglass using a grinder or saw, ensuring you wear appropriate safety gear. Afterward, prepare the area by sanding the exposed fiberglass to create a rough surface for better adhesion.Then, mix and apply fiberglass resin and fiberglass cloth or matting, following the manufacturer’s instructions, and build up layers until the floor is level.
Once the repair is dry, sand it smooth and finish with gelcoat or a suitable marine paint. Properly addressing soft spots in the fiberglass boat floor will restore its structural integrity and safety.
Related Questions:
Can You Fix Soft Spots On A Boat?
You can easily fix soft spots on a boat. Soft spots are a rotted or damaged area just beneath the upper layer of the boat flooring. If the damage is minor, you can surely fix it easily. To fix the soft spots or the spongy boat floor, you have to make a hole through this spot.
Check for a hollow sound and drill a hole. Now use a resin-based filling agent to fill this hole. This solution should go inside and fill the gaps and holes that have been made due to the damage. Let the filler settle into the hole, and then you can install the fiberglass countertop on the hole. That is the easiest way to fix the soft spots on a boat.
How To Fix A Soft Spot In A Fiberglass Boat Floor?
Diagnosing a boat floor soft area is tough. First, tap the soft place with a screwdriver. Hollow sounds indicate weak spots. Stronger materials have sharper sounds and superior tactile feedback. Mark the afflicted area with a grease pencil. If fiberglass weakening is the cause, sand the soft patch until it is less than the neighbor area. You can even sand through the fiberglass.
Following the directions for a fiberglass repair kit generally involves cutting fiberglass matting to fit the afflicted area. Fill the region with resin-based putty to raise it slightly if you’re using it. As instructed, let it heal. This will let you smooth down the putty, fix any holes, and cure it overnight or as instructed.
Can You Repair Fiberglass With Epoxy?
Not only the soft spots are dangerous, but sometimes, the fiberglass layer can get damaged too. What to do in that case? Most people would use epoxy resin to fix the issues on the fiberglass layer.
You can repair fiberglass with epoxy. In fact, it is the most reliable agent to repair fiberglass flooring. This is because epoxy bonds very well with fiberglass. But note that it alone can’t do the best work. For the best result, you should mix polyester with epoxy. An epoxy resin adheres firmly to the fiberglass flooring. In fact, polyester gel coating is also a good alternative to epoxy.
How To Fix Fiberglass Delamination?
Fiberglass delamination is a common problem when you roughly use the boat deck. However, the distressed fiberglass layer can be fixed if you know the right procedure.
To fix delaminated fiberglass, you need to follow similar steps you use for fixing soft spots. You have to make several deep holes through the deck. Now pour epoxy resin through these holes and let it dry very well. This can fix the issues fairly. Then you can have a new layer of fiberglass clothing on these holes to merge with the entire deck.
How To Fix Soft Spot In Fiberglass Boat Floor
To fix a soft spot in a fiberglass boat floor, follow these steps. First, identify the soft area by tapping the floor with a mallet, as it will produce a hollow sound where the damage exists.Next, drill small holes around the soft spot to relieve pressure and allow the area to dry.
Once that’s done, remove the damaged material by cutting out the soft or rotted fiberglass using a grinder or saw, ensuring you wear appropriate safety gear. Afterward, prepare the area by sanding the exposed fiberglass to create a rough surface for better adhesion.Then, mix and apply fiberglass resin and fiberglass cloth or matting, following the manufacturer’s instructions, and build up layers until the floor is level.
Once the repair is dry, sand it smooth and finish with gelcoat or a suitable marine paint. Properly addressing soft spots in the fiberglass boat floor will restore its structural integrity and safety.
What Is The Best Glue For Boat Floors?
The best adhesive for boat floors is a marine-grade epoxy. Marine epoxies are known for their exceptional bonding strength and resistance to water, making them ideal for the harsh marine environment.
They create a strong and durable bond between different materials, such as fiberglass, wood, or aluminum, commonly used in boat flooring. Additionally, marine epoxies are typically designed to withstand UV exposure and temperature fluctuations, ensuring a long-lasting and reliable bond.
When using marine epoxy, follow the manufacturer’s instructions carefully for proper application and curing. This adhesive will help ensure that your boat floor remains secure and resilient over time.
Final Thoughts:
I have covered pretty much everything you need to know about fixing a spongy boat deck. Starting from the tips to the steps of repairing, all have been mentioned in this article.
Now it is your turn to gather the tools, find the spongy areas, and fix them! Go and make your firm boat deck!
Great ?I should certainly pronounce, impressed with your web site. I had no trouble navigating through all tabs as well as related information ended up being truly easy to do to access. I recently found what I hoped for before you know it in the least. Reasonably unusual. Is likely to appreciate it for those who add forums or something, web site theme . a tones way for your client to communicate. Excellent task..
A few things i have seen in terms of laptop or computer memory is that often there are requirements such as SDRAM, DDR and the like, that must go with the specific features of the mother board. If the pc’s motherboard is pretty current and there are no main system issues, modernizing the ram literally normally requires under one hour. It’s one of several easiest laptop upgrade treatments one can consider. Thanks for giving your ideas.
Its such as you learn my thoughts! You seem to know so much about this, like you wrote the e book in it or something. I believe that you simply could do with a few p.c. to power the message home a little bit, however other than that, this is wonderful blog. A fantastic read. I’ll certainly be back.
Undeniably consider that which you said. Your favorite reason seemed to be on the internet the simplest factor to remember of. I say to you, I definitely get irked whilst other people think about worries that they just do not understand about. You managed to hit the nail upon the top and also defined out the whole thing without having side-effects , other folks could take a signal. Will probably be back to get more. Thanks