
Ceramic tile floors are a popular choice for their durability, aesthetic appeal, and easy maintenance. However, over time, the grout between the tiles can become discolored and grimy, making the entire floor look dull and dirty. Thankfully, with the right approach, cleaning ceramic tile grout can be a straightforward and rewarding task.
Cleaning ceramic tile grout is easy with the right supplies. Preparing the grout and applying a cleaner, followed by thorough scrubbing, rinsing, and drying will restore its shine. Optional sealing can prevent future stains and maintain the pristine appearance of your floors.
In this article, we will walk you through a step-by-step guide to bring back the shine and freshness to your ceramic tile grout, leaving your floors looking pristine once again.
Time: A Few Hours
Cost: Dollars 5 To 20
Before you start to clean ceramic tile grout, gather the tools and materials listed below.
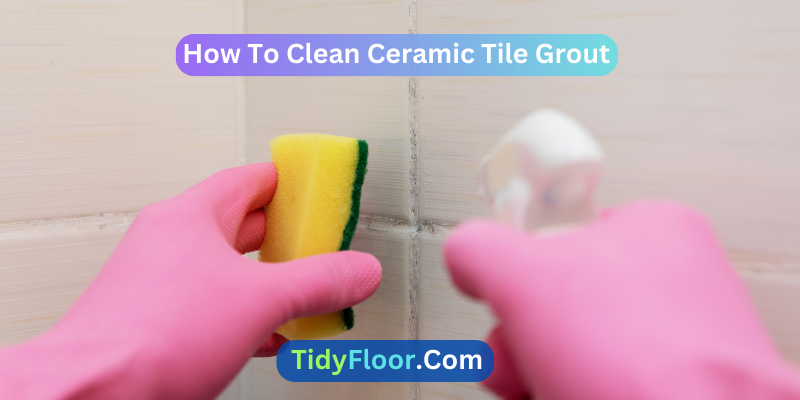
- Old Toothbrush: A toothbrush can be handy for tackling stubborn stains in tight spots.
- Bucket of Water: This will be used for rinsing and diluting the grout cleaner.
- Clean Cloth or Sponge: For wiping away excess cleaner and water.
- Grout Cleaner: You can either buy a commercial grout cleaner or create your own homemade solution using ingredients like baking soda, vinegar, hydrogen peroxide, or lemon juice.
- Protective Gear: Wear rubber gloves and eye protection to shield your skin and eyes from any potential chemical irritation.
- Scrub Brush: Choose a brush with stiff bristles that can effectively reach into the grout lines.
How To Clean Ceramic Tile Grout Naturally: 6 Step-By-Step Process
To clean ceramic tile after grouting is quite a simple task if you know the process. Though it seems challenging to clean white grout ceramic tile, it is very possible to leave it sparkling white again. To help you out, here is a guide to follow.
Step 1: Preparing the Grout
Before applying any cleaning solution, it’s essential to remove surface debris and dirt from the grout. Sweep or vacuum the floor to get rid of loose dirt and dust. This will prevent the grout cleaner from turning into a muddy paste and help the cleaner penetrate the grout more effectively.
Step 2: Applying the Grout Cleaner
Now it’s time to apply the grout cleaner. If you’re using a commercial cleaner, follow the instructions on the product label. If you prefer a DIY solution, you can mix baking soda with water to form a paste or create a mixture of vinegar and water in a 1:1 ratio. Apply the cleaner directly to the grout lines, ensuring they are thoroughly coated.
Step 3: Scrubbing the Grout
Using the stiff-bristled brush, scrub the grout lines in a circular motion. Focus on one small area at a time to ensure thorough cleaning. For more stubborn stains, you can use an old toothbrush to apply extra pressure. Take your time and be patient, as this step may require a bit of effort, especially if the grout hasn’t been cleaned in a long time.
Step 4: Rinsing the Floor
Once you’ve scrubbed the entire floor, it’s time to rinse off the grout cleaner. Fill a bucket with clean water and use a sponge or cloth to wipe away any remaining cleaner from the tiles and grout. Change the water as needed to ensure you’re not spreading any residue around.
Step 5: Drying and Inspecting
After rinsing, allow the floor to air dry completely. Once dry, inspect the grout lines to see if any stains or discoloration persist. If needed, repeat the cleaning process or target specific problem areas with spot cleaning.
Step 6: Sealing the Grout (Optional)
To prevent future stains and make cleaning easier, consider applying a grout sealer once the grout is completely dry. This will create a protective barrier and help repel dirt and spills.
7 Tips About the Best Way to Clean Ceramic Tile After Grouting
After completing the grouting process, it’s crucial to clean ceramic tile and grout properly to achieve a flawless and polished finish. Here are some essential tips for the best way to clean ceramic tile after grouting:
1. Wait for Proper Curing:
Allow the grout to cure for the recommended time, usually 24-48 hours, before attempting to clean the tiles. This ensures the grout is fully set and avoids any potential damage or discoloration.
2. Remove Excess Grout:
Before cleaning, use a damp sponge or cloth to gently wipe away any excess grout or haze from the tile surfaces. Be cautious not to disturb the grout lines during this process.
3. Use a Neutral Cleaner:
Opt for a pH-neutral tile cleaner to protect the tiles and grout from potential damage. Acidic or harsh cleaners can harm the tile surface and degrade the grout over time.
4. Dilute the Cleaner:
Mix the tile cleaner with water following the manufacturer’s instructions. A diluted solution will effectively clean the tile without leaving behind residue.
5. Test in a Small Area:
Before cleaning the entire floor, perform a spot test in an inconspicuous area to ensure the cleaner does not cause any adverse reactions to the tile or grout.
6. Scrub Gently:
Use a soft-bristled brush or a mop with a gentle scrubbing pad to clean the tiles. Avoid using abrasive tools or wire brushes that can scratch the tile surface and grout.
7. Work in Sections:
Clean the tiles in small sections to ensure you can effectively manage the cleaning process and prevent the cleaner from drying on the tiles.
10 Mistakes to Avoid When Cleaning Ceramic Tile and Grout in the Shower:
Cleaning the ceramic tile and grout in the shower is essential for maintaining a hygienic and visually appealing bathroom. However, there are common mistakes to avoid to ensure the best results and preserve the integrity of your tiles and grout. Here are some mistakes to avoid when you clean grout for ceramic tile.
1. Using Harsh Abrasives:
Avoid using harsh abrasive cleaners or scouring pads on ceramic tiles and grout. These can scratch and damage the tile surface and grout, making them more susceptible to staining and discoloration.
2. Neglecting Regular Cleaning:
Regular cleaning is crucial for preventing soap scum, mold, and mildew buildup. Neglecting the shower’s cleanliness can lead to stubborn stains and make cleaning more challenging in the long run.
3. Allowing Standing Water:
Leaving standing water in the shower encourages mold and mildew growth. Ensure the shower area is well-ventilated and dry after each use to prevent these issues.
4. Using Ammonia or Vinegar on Grout:
Ammonia and vinegar are acidic and can damage grout, leading to deterioration and discoloration over time. Instead, opt for pH-neutral or mild alkaline cleaners specifically formulated for grout.
5. Skipping the Test Patch:
Always perform a test patch of the cleaner in a small, inconspicuous area before applying it to the entire shower. This helps ensure the cleaner is safe and doesn’t cause any adverse reactions.
6. Cleaning with Colored Sponges:
Avoid using colored sponges, as the dye may bleed onto the tiles and grout, leaving stains that are difficult to remove. Stick to white or neutral-colored sponges for shower cleaning.
7. Neglecting Grout Sealing:
Regularly seal the grout to protect it from water and stains. Skipping this step leaves the grout vulnerable to moisture penetration, leading to mold growth and discoloration.
8. Overlooking Tile Edges:
Pay attention to the edges of the tiles and the grout lines. These areas are often overlooked during cleaning and can accumulate grime, soap scum, and mildew.
9. Using Too Much Water:
Excessive water during cleaning can saturate the grout, causing it to weaken and crumble over time. Use a damp cloth or sponge for cleaning instead of soaking the entire shower area.
10. Mixing Cleaners:
Never mix different types of cleaners, especially bleach and ammonia-based products. These combinations can release harmful fumes and pose health hazards.
FAQs:
How Often Should I Clean My Ceramic Tile Grout?
Cleaning frequency depends on foot traffic and usage. In high-traffic areas like kitchens and bathrooms, cleaning every 2-4 weeks is recommended. For low-traffic areas, monthly or bi-monthly cleaning may suffice. Regular maintenance prevents stubborn stains and keeps your floors looking fresh.
Can I Use Bleach To Clean Grout?
While bleach can be effective, it may damage the grout and surrounding tiles. It is best to avoid using bleach as a regular cleaner. Instead, opt for milder solutions like baking soda and water or commercial grout cleaners specifically designed for tile surfaces.
Will Vinegar Harm My Grout?
Vinegar is acidic and can deteriorate grout over time, leading to potential discoloration and weakening. Limit the use of vinegar-based solutions on grout and opt for neutral pH cleaners or baking soda mixtures to ensure grout longevity.
Should I Hire A Professional To Clean Ceramic Tile Grout?
Hiring a professional is an option for heavily soiled grout or when you lack time and equipment. However, DIY cleaning is cost-effective and can yield excellent results with proper technique and regular maintenance.
Can I Use A Steam Cleaner On Ceramic Tile Grout?
Using a steam cleaner can be effective in removing dirt and grime from grout lines. However, avoid using excessive pressure or high heat, as this could damage the grout or cause it to crack.
How Do I Know If My Grout Needs Resealing?
Perform a simple water droplet test – if water is absorbed into the grout, it’s time to reseal. Generally, grout should be resealed every 1-3 years to maintain its protective barrier against stains and spills.
Can I Clean Colored Grout With Harsh Cleaners?
Avoid harsh cleaners on colored grout, as they may cause fading or discoloration. Stick to mild solutions and always do a spot test in an inconspicuous area before using any cleaner on colored grout.
Why Do My Grout Lines Stay Discolored After Cleaning?
Stubborn stains may be deeply embedded or the result of mold or mildew growth. Try using a mixture of hydrogen peroxide and baking soda, or a commercial mildew cleaner specifically formulated for grout.
Are There Any Eco-Friendly Options For Cleaning Grout?
Yes, several eco-friendly options exist to clean grout off ceramic tile. Vinegar, baking soda, lemon juice, and hydrogen peroxide can be combined to create effective grout-cleaning solutions that are safe for the environment.
Can I Use A Wire Brush On Ceramic Tile Grout?
Wire brushes are too abrasive for grout and may scratch or damage it. Opt for a stiff nylon brush instead, as it is tough enough to remove dirt but gentle enough not to harm the grout or tiles.
Conclusion
Now you know how to clean ceramic tile grout with the right approach and the proper tools. Regular maintenance and cleaning will not only enhance the appearance of your floors but also prolong their lifespan.
By following this step-by-step guide and being diligent with your cleaning routine, you can keep your ceramic tile grout looking fresh and pristine for years to come.