
A ceramic tile backsplash can be a beautiful and practical addition to your kitchen or bathroom. Not only does it protect the walls from spills and splatters, but it also adds a touch of elegance. Installing ceramic tile backsplash may seem like a daunting task, but with the right tools and a little patience, you can learn how to install ceramic tile backsplash.
To install a ceramic tile backsplash, prepare the surface. Clean and dry the wall. Measure and mark the centerline. Apply adhesive with a notched trowel. Press tiles onto the mortar, adding spacers. Once dry, apply grout diagonally, wiping excess. After grout sets, buff tiles clean.
In this step-by-step guide, we’ll walk you through the process of installing a ceramic tile backsplash to enhance the aesthetics and functionality of your home. Let’s dive deeper into the matter.
Ceramic tile backsplash installation requires some tools and materials. The list is given below.
- Trowel
- Level
- Measuring tape
- Sponge
- Ceramic tiles of your choice
- Tile adhesive
- Tile spacers
- Tile cutter or wet saw
- Grout
- Grout float
Time: A Few Days
Cost: Dollars 200 To 800
How to Install Ceramic Tile Backsplash: 7 Step-by-Step Process
Installing backsplash ceramic tile is not as hard as it may sound. When you know the right technique, you can complete the task. To help you out, here is a complete guide that you may follow.
Step 1: Prepare the Surface
Ensure the surface where you’ll be installing the backsplash is clean, dry, and smooth. Remove any existing wallpaper, paint, or debris. Fill any holes or cracks with a spackling compound and sand the surface to create a flat and even base for the tiles.
Step 2: Measure and Plan
Measure the area where you’ll be installing the backsplash and calculate the number of tiles needed. Start by finding the center point of the wall and use a level to draw vertical and horizontal guidelines. This will help you maintain straight lines during the installation process.
Step 3: Apply Tile Adhesive
Using a trowel, apply tile adhesive to a small section of the wall along the guideline. The adhesive should create ridges, which will help the tiles adhere better. Be sure to work in manageable sections to prevent the adhesive from drying out before you can install the tiles.
Step 4: Install the Tiles
Place the first tile on the adhesive, gently pressing it into place. Insert tile spacers on all sides to maintain even gaps between tiles. Continue placing tiles along the guideline, working outward from the center. Use a tile cutter or wet saw to trim tiles as needed to fit around corners and edges.
Step 5: Allow Adhesive to Set
After all the tiles are in place, allow the adhesive to set according to the manufacturer’s instructions. This usually takes around 24 hours, but it may vary depending on the type of adhesive used.
Step 6: Apply Grout
Once the adhesive has been set, remove the tile spacers and mix the grout following the instructions on the package. Use a grout float to apply the grout, pressing it into the spaces between the tiles at a 45-degree angle. Wipe off excess grout with a damp sponge before it dries on the tiles.
Step 7: Seal the Grout (Optional)
Some grout types may require sealing to prevent staining and moisture absorption. If needed, apply a grout sealer following the manufacturer’s instructions.
7 Tips About How to Install a Ceramic Tile Backsplash in the Kitchen
Backsplash ceramic tile installation in the kitchen can transform the entire space, adding both beauty and functionality. Before you embark on this DIY project, consider the following tips to ensure a successful installation:
1. Plan and Measure Carefully:
Take precise measurements of the area where you’ll install the backsplash. Plan the layout and design, considering factors like the size and color of the tiles, the pattern you want to create, and any focal points or decorative accents you wish to incorporate.
2. Choose the Right Tiles:
Ceramic tiles come in various sizes, colors, and textures. Choose tiles that complement the overall kitchen design and match your personal style. Additionally, opt for tiles that are easy to clean and maintain in a high-traffic area like the kitchen.
3. Use Tile Spacers:
Tile spacers help maintain uniform gaps between the tiles, ensuring a professional finish. They also allow for easy and consistent grout application, preventing any uneven spacing or alignment issues.
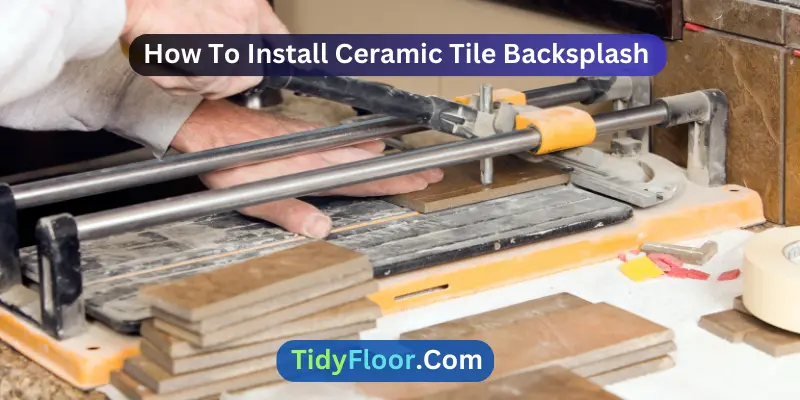
4. Cut Tiles with Precision:
Use a tile cutter or wet saw to make accurate cuts, especially around corners, edges, and outlets. Measure twice before cutting to avoid waste and ensure a perfect fit.
5. Check for Level and Alignment:
Throughout the installation process, regularly check for level and alignment using a spirit level and guidelines. This will help you maintain straight lines and a cohesive look.
6. Allow Sufficient Drying Time:
After completing the installation, give the adhesive and grout ample time to dry and set. This ensures a strong bond between the tiles and prevents any future issues.
7. Consider Sealing the Grout:
While ceramic tiles are non-porous and generally don’t require sealing, consider sealing the grout to protect against stains and moisture, especially if you’re using unglazed tiles or installing the backsplash in a high-moisture area like behind the sink or stove.
8 Mistakes to Avoid When Installing Ceramic Bullnose Wall Tile as a Backsplash:
Installing ceramic bullnose wall tile as a backsplash can add a polished and finished look to your kitchen or bathroom. However, it’s essential to be aware of common mistakes to ensure a smooth and successful installation:
1. Incorrect Tile Spacing:
Neglecting to use tile spacers or using the wrong size can result in uneven gaps between the tiles. Proper spacing ensures a professional look and allows for smooth grout application.
2. Ignoring Tile Layout and Design:
Not planning the tile layout or considering the design can lead to unsightly cuts, uneven patterns, or misplaced focal points. Take time to plan the layout, considering the size and shape of the tiles and any decorative elements.
3. Poor Tile Cutting Techniques:
Incorrectly cutting the bullnose tiles can result in chipped or misshapen edges, affecting the overall appearance. Use a tile cutter or wet saw with precision, and double-check measurements before cutting.
4. Rushing Adhesive and Grout Application:
Working too quickly during adhesive and grout application can lead to messy joints, uneven lines, and inadequate adhesion. Take your time, work in small sections, and clean off excess grout promptly.
5. Neglecting Level and Alignment:
Ignoring level and alignment checks can result in crooked lines and uneven tiles. Use a spirit level and guidelines throughout the installation process to ensure straight lines.
6. Using Poor-Quality Adhesive and Grout:
Using low-quality adhesive or grout can lead to weak bonding, cracking, and staining over time. Invest in high-quality products that are suitable for your specific tile and surface type.
7. Not Sealing the Grout (if required):
Some grout types and areas might require sealing to prevent staining and moisture penetration. Check the product specifications and apply a suitable grout sealer if needed.
8. Lack of Patience and Attention to Detail:
Tile installation requires patience and precision. Rushing through the process or overlooking small details can lead to unsatisfactory results. Take your time, be attentive, and enjoy the process of creating a beautiful and durable backsplash.
FAQs:
How Long Does It Take To Install A Ceramic Tile Backsplash?
The time required depends on the project’s size and your experience level. On average, it may take a few days, including preparation, adhesive, and grout drying time. Smaller areas may be completed in a day, while larger or more complex projects can take a bit longer.
Can I Install A Ceramic Tile Backsplash Myself?
Yes, installing a ceramic tile backsplash can be a DIY project with the right tools and guidance. Basic DIY skills and patience are essential. However, if you lack confidence or have a large and complex area, consider hiring a professional tile installer.
Do I Need To Remove The Existing Backsplash Before Installing Ceramic Tiles?
Ideally, yes. A flat, clean surface is essential for proper tile installation. Removing the existing backsplash allows you to create a smooth base for the new tiles, ensuring better adhesion and a professional-looking finish.
How Much Will It Cost To Install A Ceramic Tile Backsplash?
The cost depends on factors like tile type, quantity, adhesive, grout, and tools. On average, a ceramic tile backsplash project may cost between $200 to $800. However, it can vary based on your choices and the specific requirements of your project.
Can I Install Ceramic Tiles Over Painted Backsplash Walls?
It’s not recommended. Painted walls might have an uneven texture that can affect tile adhesion. It’s best to remove paint or any existing covering, prepare the surface, and apply the tiles on a clean, smooth wall.
Do I Need To Seal The Backsplash Ceramic Tiles?
Ceramic tiles are non-porous and generally do not require sealing. However, if your tiles have a porous surface or you’re using unglazed tiles, it’s recommended to apply a tile sealer to protect against stains and moisture.
Can I Install A Tile Backsplash Over Drywall?
Yes, installing a ceramic tile backsplash over drywall is common. Just ensure the drywall is properly prepared, without any damage or loose areas. Consider using a cement backer board for wet areas like the kitchen or bathroom.
How Do I Clean And Maintain The Ceramic Tile Backsplash?
Regularly clean the backsplash with a mild detergent and water solution. Avoid abrasive cleaners that can damage the tile surface. Periodically check for any loose or cracked tiles and replace them promptly to maintain the appearance and functionality.
Can I Use Ceramic Tiles For A Shower Or Tub Surround?
Ceramic tiles can be used for a shower or tub surround. Ensure to use of appropriate waterproofing techniques and materials like a cement backer board and waterproof membrane to protect the underlying structure from moisture damage.
Conclusion
Now you know how to install ceramic tile backsplash. With the right materials, tools, and this step-by-step guide, you can successfully complete this DIY project and enjoy the results for years to come.
Remember to take your time, follow the instructions carefully, and maintain a patient approach throughout the installation process. Happy tiling!