
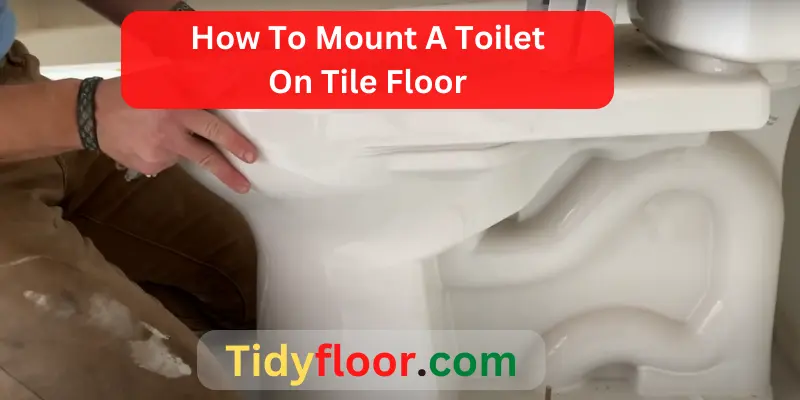
A beautifully decorated and perfectly built bathroom can be the center of a house. Mounting or installing a toilet completes the process of building a bathroom. But do you have any idea how to mount a toilet on the tile floor?
You must know how to do it perfectly without making mistakes. Even if you aren’t familiar with mounting a toilet on tile, don’t stress about it. I’ve summed up the procedure for you. There are a few steps that you need to follow.
However, here you’ll have complete step-by-step guidance on mounting a toilet, and the mistakes you need to avoid, and as a bonus, you’ll get tips that will be even more helpful. So, keep reading this article and forget about going through the painful process of gathering information from thousands of websites.
4 Steps To Mount A Toilet On Tile Floor: Beginners Guide
Mounting a toilet on a tiled floor on your own is not easy, but it’s feasible. Before jumping right into the guidance, let me list some essential tools and some additional materials,
Step 1: Required Materials
You need to take preparation before you start installing the toilet. There are some preparatory works like gathering all the materials and tools required. Here I’m listing them for you.
- Draining pipe
- Hose
- Fiber, tow, or Lenta-fum
- Ball valve
- Drill
- Sealant
- Adjustable spanner or monkey wrench
- Screwdrivers
- Kern
- Regular pencil or chalk, and
- Spatula.
Step 2: Installing The Toilet Flange On A Tiled Floor
If you want to install a toilet, then the first thing you need to do is to install and secure the flange of the bathroom. Follow the guidance below to do the work perfectly.
- Setting The Flange In Position:
Start with setting the flange in multiple positions. The back holes of the toilet flange should be parallel to the ground, and the two slots should be aligned to the wall of each side of the toilet.
- Mark And Drill:
After placing the flange, find the spot where you want to drill. Top flanges come with four to six holes around the edge. Drill at least four of those holes to cover the flange’s entire edge. Now use the holes to anchor the flange to the floor.
- Diamond Drilling:
Take preparation for diamond drilling. Cutting through the tiles can be tricky, but a diamond drill will make the job easy. To do so, dip the drill into a cooling oil. This cooling treatment will keep the drill cool.
If you notice any smoke coming from it while drilling the tiles, just dip the drill into the cooling oil again. And keep on repeating as many times as you need. Place the drill onto the marked areas and twist it back and forth. This will help the drill to have a much firmer grip on the surface, especially if the floor is covered with polished tiles or glazed.
- Drill The Marked Holes:
After you have a firm grip on the floor, start drilling the tile. First, start with a low speed. Go straight down the tiles and increase the speed of your drill when you have gone through it. By doing this, you’ll be able to drill in the backboard and subfloor. Keep on repeating this step for every hole mark.
- Install The Screws:
For the final part, after you’ve drilled all the holes, it’s time to install all the screws and secure the flange. To do so, change your drill for a screwdriver addition, then slip the screws into the holes through the tiles and subfloor.
Finally, fasten the flange on the surface using these screws. Now the flange is secured on the tiled floor.
Step 3: Setting The Toilet Bowl
For the central part, you need to set the toilet bowl. You need to be gentle while doing this work, or else you might break the bowl. The following steps will help you to set up the toilet bowl.
- Marking The Place:
To set the toilet bowl, the first thing you need to do is to mark the place with a pencil or chalk. Make sure you have the 4-inch sewer pipe, and your toilet bowl is 1 foot above the pipe. Now outline the frames of the base of your toilet. Put visible points inside the outline at 90 degrees to the floor.
- Make Sure The Floor Is Ready To Drill:
Before marking the spot, your work of setting the flanges should be done. Of course, you don’t want the drill to slip over the tile floor. To secure and ensure that the work was done correctly, many experts suggest that you should moisten the bottom for stuffing water. And by doing this, the floor should be ready to drill.
- Drill To Fasten:
Now drill the holes to fasten the toilet. After drilling and fastening, you need to seal it and apply sealant on the drawn spot. Then use an adhesive on all the pins or fasteners because sealing it will prevent the expansion of extra moisture under your toilet.
- Installation Of The Toilet Bowl:
Now for the final part, installing the toilet bowl. Set the bowl on the marked spot very carefully, then tighten the bolts and clean the excess sealant with a spatula.
After the installation, the noticeable sealant should be covered with grout.
Step 4: Installation Of The Tank
Now it’s time for the tank to be installed. Follow the instructions given below to be done with the installation of the tank.
- Be careful when you’re positioning the large-diameter rubber. Now place that rubber on the tank from inside. Then insert the bolts.
- Now, after that, slowly get the tank down onto the toilet.
- Hand string the nuts while you slide a nylon washer onto each bolt. Hold the bolt head in the right place and hand tighten them.
You can use a screwdriver. While tightening the nuts, keep checking that the tank is level.
- Lastly, attach the handle of the tank to the flipper chain.
4 Mistakes You Should Avoid When Mounting A Toilet On Tile Floor:
Most people make some mistakes while mounting a toilet. And they end up with incomplete work. This is why labor and money are wasted. So before getting an excellent ending, you should avoid mistakes. Here I’m listing some of the common mistakes everyone makes.
1. Wrong Placement Of The Toilet Flange:
So, the flange is integral to installing a toilet, as it connects the sewer system with the bathroom. If you place the toilet flange too high, your toilet will probably fall and break.
You won’t be able to connect the sewer pipe with it. Many people are not experts or professionals, so they often make this mistake. So, avoid such errors.
2. Over-Tightening The Screws:
Many people make this mistake. They over-tighten the screw. Overdoing it will result in the fall of the piping system in a week. The damage caused by over-tightening might not be seen immediately, but you’ll see it in a week.
3. Having Insufficient Knowledge Of The Tools And Choosing The Wrong Ones:
As a beginner or someone with less experience, it is possible to know everything about the tools you need. In this case, you need to know about the tools first. Many choose the wrong tools. This damages the pipes and will result in a failed installation.
Here are some tips.
- To avoid damage, use a strap wrench. As an option, use an electrician’s tape to enclose the jaw of the adjustable spanner.
- Use an extension basin wrench to remove the harsh faucet reserve tubes and screws.
- Use a wire brush to speed up the interior and external speed.
4. Not Turning Off The Main Water Line:
If you forget this step, then there will be a possibility that your bathroom will be flooded while working. Many think that skipping this step might not harm. But trust me, if you skip this, your installation process will be destroyed.
4 Tips To Install A Toilet Without Damaging Tile Floor
Installing a toilet on a tile floor is a risky job. You might damage the tile if you’re not being careful. But no need to get worried. Here are some tips for you. Hopefully, following these steps will make sure that you won’t damage your tiled floor,
Tips 1: Measuring The Distance And Using A Flange Extender
Use a ruler or measuring tape to measure the distance of the floor from the flange. A flange extender is needed in this process. You should have an extender with a thickness equal to the distance or ⅙ inch less than that.
Though these extenders come in various thicknesses, you might still need two of them to have the required consistency. This will keep the toilet in its correct position and won’t damage the tile.
Tips 2: Use Paper Between The Toilet And The Tiled Floor
Use paper or cloth between the floor and the toilet to protect the floor from getting any scratches. You don’t need to get anything fancy for this. A typical paper would be enough. Place the paper between the toilet and the floor. After that, you can start working, and it won’t be damaging.
Tips 3: Remove Excess Water While Working
Water can damage the tiled floor. You don’t want that for your bathroom, do you? So while installing the toilet, extract excess water so it won’t damage the tile. Remember to turn off the water line.
Tips 4: Use A Pick Up Stix To Lift The Toilet While Positioning:
Position the pickup stix right beneath the rim of the toilet bowl. Now lift it and center it over the toilet flange. Keep the rim parallel with the surface while lowering the toilet.
When it meets the wax ring, you might feel a little resistance. Wiggle the toilet side to side till it reaches the correct position. Doing this will make your work more accessible, and you won’t damage the tile.
How to Install a Toilet Flange On a Tile Floor
Installing a toilet flange on a tile floor involves a few steps. First, ensure the floor is clean and level. If the old flange is still in place, remove it using a chisel and hammer. Next, insert a wax ring into the flange.
Then, align the flange with the waste pipe, ensuring it sits flush with the tile. Secure the flange by driving corrosion-resistant screws through the holes in the flange and into the subfloor. Make sure it’s tight and level.
Finally, set the toilet onto the flange, align the bolts with the holes on the base of the toilet, and tighten the nuts to secure the toilet in place.
How to Level a Toilet On a Tile Floor
Leveling a toilet on a tile floor is crucial to prevent leaks and ensure stability. Start by placing a level across the toilet bowl or tank to determine which areas need adjustment. If it’s unlevel, use plastic shims to even it out.
Gently tap the shims into place until the toilet is level. Be careful not to overtighten, which can crack the toilet. Once level, carefully trim any excess shim material. Recheck the level, and if it’s stable, tighten the toilet bolts evenly, alternating between sides.
This ensures a secure fit without rocking. Finally, caulk around the base to create a watertight seal, and you’re done.
How to Level Toilet On Uneven Tile Floor
Leveling a toilet on an uneven tile floor is essential for stability and preventing leaks. Begin by identifying the uneven areas by placing a level across the toilet bowl or tank. Once you’ve pinpointed the problem spots, carefully lift the toilet using plastic toilet rocks on tile floor shims.
Gently slide these shims underneath the base of the toilet until it’s level. Use a rubber mallet or a block of wood to tap the shims into place, ensuring they are snug but not too tight to avoid damaging the toilet. Trim any excess shim material and recheck the level to ensure the toilet is stable.
To finish, tighten the toilet bolts evenly, alternating between sides, and apply caulk around the base for a watertight seal. This process will help ensure a secure and level toilet on your uneven tile floor.
How to Replace a Toilet Flange On a Tile Floor
Replacing a toilet flange on a tile floor involves several steps. First, turn off the water supply and disconnect the toilet. Remove the wax ring and old flange. If the subfloor is damaged, repair or replace it.
Place the new flange on top of the tile and align it with the waste pipe. Ensure it’s level with the tile surface. Use stainless steel screws to secure the flange to the subfloor, making sure it’s tight and flush. Install a new wax ring on the flange.
Finally, reattach the toilet by aligning it with the flange bolts and pressing it down to compress the wax ring. Tighten the nuts on the flange bolts, reconnect the water supply, and test for leaks.
How to Install a Toilet On An Uneven Tile Floor
To install a toilet on an uneven tile floor, you’ll need to level it properly for stability and to prevent leaks. Start by identifying the uneven areas by placing a level across the toilet bowl or tank. Once the problem spots are identified, use plastic toilet shims to level the toilet.
Gently slide the shims underneath the base until the toilet is even. Carefully tap the shims in place using a rubber mallet or a block of wood, ensuring they are snug but not too tight to avoid damaging the toilet.
Trim any excess shim material, recheck the level for stability, and then tighten the toilet bolts evenly on both sides to secure it in place. Finally, caulk around the base to create a watertight seal.
Related Questions:
Is It Worth To Mount A Toilet On The Tile Floor?
Mounting a toilet on the tile floor is tricky and a lot of work, but it is worth the work before starting the process. You just need to finish the plumbing work by experts.
Then you have to anchor the flange, so it’s secured, and then you need to position the toilet bowl perfectly. I’ve summed up all of these in my article. Please read the whole article to have a clear view.
Can You Install A Toilet On Tile Floor?
You can install a toilet on the tile floor. It is best to install after you’ve done the tile work. Because if you do the toilet installation work first, then moving around it and setting the tiles on the surface would be difficult. Toilet bases are different in shape and have many curves.
Cutting the floor around it is difficult, even for the expert. But you most certainly need to be very careful when installing the toilet on a tile floor because you might damage the tile if you’re not careful.
Set the toilet flange and anchor it. Then set the toilet on it, and attach the sewer line. Now tighten the screw, and you’re done. For details, go through the article.
Does A Toilet Flange Need To Be Anchored To The Floor?
A toilet flange doesn’t necessarily need to be anchored to the floor. You can just cement the pipe below. It would be a good choice for a tiled floor and less damaging. I’ve seen a toilet installation lasting many years without anchoring the flange.
Even so, securing the flange won’t harm anyone. So after clearing the old wax from the surface, apply primer and glue to the flange and pipe surfaces. Take off the old toilet if you’re renovating the bathroom.
Can You Put A Toilet Flange On Top Of Tile?
You can put a toilet flange on top of the tile. The flange has to be on top of the completed tile floor. It means the lowest perimeter of the toilet flange has got to be on the exact plane as your toilet. So if the bathroom is on the tile, the flange should be on top of the tile too.
The space between the toilet and the closing ground is constructed for this height. If you have the flange lower than the completed base, you will risk leaking water from the bathroom into the floor or, even worse, space between the tile or subfloor. Because the wax ring was built only to consume the air gap, not to work as a tunnel when water is lacking.
How Far Should Toilet Flange Sit Above Floor?
Toilet flanges must be 1/4″ above a finished floor. This is so that the wax ring can seal appropriately to the flange and the center of the toilet. If a proper seal is not attained, it might result in leakage.
If the flange is lower than the floor then you might need foam rings that enclose the distance for a decent seal. The foam seal will also fasten in your rocking toilet issue if there are any. Although it’s not suggested and also against the procedure for wax rings, you can accumulate the foam seals.
Does Toilet Flange Go Inside Or Outside Pipe?
A toilet flange goes inside the pipe. It should be fastened using glue to the inside of the tube. This ensures it does not move once the toilet is properly installed on top. While setting up, the flange should be flush with the surface or tiled floor.
Trying to install the flange outside of the pipe will generate an imbalanced look which won’t do for your toilet. And for this reason, it’s essential to ensure that the flange goes perfectly right into the pipe. Then it should be glued to the faucet.
Can You Put a Toilet on a Tile Floor?
Yes, you can absolutely install a toilet on a tile floor. In fact, it’s a common practice. Tile is a durable and water-resistant flooring material, making it suitable for bathroom installations.
When placing a toilet on a tile floor, it’s important to ensure the surface is level and clean. To do so, you might need to use toilet shims to level the toilet and create a secure seal with the wax ring. Proper installation is crucial to prevent leaks and maintain the toilet’s stability.
With the right tools and techniques, setting a toilet on a tile floor can be a straightforward DIY task or can be done by a professional plumber.
What Do I Put Under My Bathroom Floor Tiles?
When installing bathroom floor tiles, it’s essential to create a solid and stable foundation. Typically, this starts with a subfloor, which should be smooth, level, and sturdy. The tiles are adhered to the subfloor using thinset mortar, ensuring a strong and lasting bond.
In wet areas like bathrooms, the addition of a waterproofing membrane, such as RedGard, is crucial to prevent moisture penetration and water damage. If desired, an uncoupling membrane can be used to isolate the tile from potential subfloor movement, reducing the risk of tile cracks.
Finally, grout is applied between the tiles to provide stability and a finished look. This layered approach ensures a successful and long-lasting bathroom tile installation.
How Do I Keep My Toilet From Moving On Tile?
To prevent your toilet from moving on tile, it’s crucial to ensure the tile floor is level and clean. After confirming the floor’s stability, use plastic toilet shims, placing them around the base of the toilet to fill any gaps between the toilet and the tile.
The shims should be inserted at the outer edges of the toilet base. Subsequently, carefully tighten the closet bolts that secure the toilet to the flange and the floor, but avoid over-tightening to prevent damage.
Finally, apply a bead of caulk around the base of the toilet to provide added stability and create a watertight seal. This combination of leveling, shimming, bolting, and caulking will keep your toilet securely anchored to the tile floor.
Final verdict
Mounting a toilet is a lot of work, but having complete guidance can make the process easier. The motive of this article was to satisfy your needs. However, the plus point of this article is getting information all in one.
By the end of this article, I hope you’ll know how to mount a toilet on the tile floor. So, build your dreamy perfect bathroom. And without any hesitation, start the work accordingly.