
Are you thinking of replacing your boat floor? If yes, you must be wondering how to replace the boat flooring. It’s challenging if you have no prior experience. But with the proper guidance and instructions, you can crack this.
You need to follow some simple tactics and steps to get new flooring. With the right set of tools and concentration, it is possible to replace boat flooring. If you are worried about who will guide you through this, I am here to help you. In each section of this article, you will get all the information you need to replace boat flooring.
From years of experience, I have acquired a lot of knowledge on boat flooring replacement. In this article, I will share all my learnings of redoing boat floor with you. So get ready to learn and work on boat flooring replacement.
8 Steps To Replace A Boat Floor: A Step-by-step Guide
In this section, I will (1) discuss installing plywood flooring. This is because, in most cases, people replace the boat flooring with plywood flooring. Plywood flooring is excellent in appearance, and if installed in the right method, it lasts for a long time. However, note that the following steps are similar to replacing any other type of flooring.
Here is the guide for step-by-step replacing the boat floor:
Step 1: Get Your Tools And Materials Ready
A set of tools are required for this project of floor replacement. If you gather them beforehand, the task becomes more accessible and faster. You can consult an expert if you need clarification about the materials needed for boat floor replacement. But generally, you would need the items listed below:
- Plywood board or plank;
- Circular saw;
- Plastic sheet and marker (if you make a template);
- Epoxy resin;
- Measuring tape;
- Drill machine;
- Fiberglass sheet;
These elements are required for this project. Added to these, depending on the damage done, you may need some other tools for repairing the flooring.
Step 2: Prepare For The Replacement
Before you replace the flooring, there are some tasks you need to do. To start the project, some preparations are required. As part of the preparation, there are three tasks to do:
- Put the boat on a cradle. The cradle stabilizes the boat on its platform so you can work on the deck without tremble. If you don’t keep the boat on a cradle, it may move during the project and create a disturbance;
- Next, check the transom. If it is damaged or fragile, you have to fix it first. As the transom faces pressure and impact regularly, it can damage, and you must fix this before the floor replacement. For checking, put pressure on it and look for a creaking sound on the wooden platform. If you hear the sound, check it and repair it;
- The last step is to empty the boat floor to start the project. Starting from the cables and machine to your belongings, remove them all and get ready for the task;
Now, we can move on to the next step of this project.
Step 3: Make A Boat Floor Template (Optional)
You must make a boat floor template if you order a specific flooring from a company. The template is created by laying a plastic sheet on the deck and marking an outline.
Take a marker and mark the outline of the deck. Also, make notes of the areas like the console, steering, holes, hinges, etc., and write on the sheet for clarity. Click photos of the template or send the template to the company. The company will take references from the template, digitize it, and send you the flooring you have ordered.
Step 4: Remove The Existing Flooring
Now is the turn to remove the existing flooring to install the new one. To remove the existing flooring, you need to cut through the surface to divide the flooring into sections. Then you can easily pull off each section and remove the entire flooring. However, this mechanism may vary depending on the flooring you have.
Use a circular saw to cut through the flooring. Be careful of the depth you are running the saw into so that you don’t accidentally cut the hull. Generally, ⅝ inch depth is the right measurement for cutting through the flooring.
Be organized about removing the flooring. Cut and remove it carefully and store it until you install the new flooring. The old flooring can be a good reference for making the new flooring. So keep it for the next steps.
Step 5: Prepare The Plywood
To install the new floor for the boat, you would need to prepare the plywood board or planks. As part of the preparation, you first need to know how many planks you would need. For that, measurements are required. You can either refer to the boat floor template or take fresh measures.
Measure the width and length of each section of the boat, starting from the bow to the stern. The width will vary as per the shape of the boat. So be very cautious while measuring. Make notes of the measurements and cross-check the number with the old flooring. This way, take accurate measurements.
Then put this measurement on the plywood board and start cutting and shaping the planks. After cutting the plywood, use oil-based paint to paint the planks. This makes the planks water-resistant, increasing the longevity of the flooring.
If you want to change the stringers, do change them now. As installing the new flooring, you should make the frame strong and stable. Hence, this is the best opportunity to change the stringers.
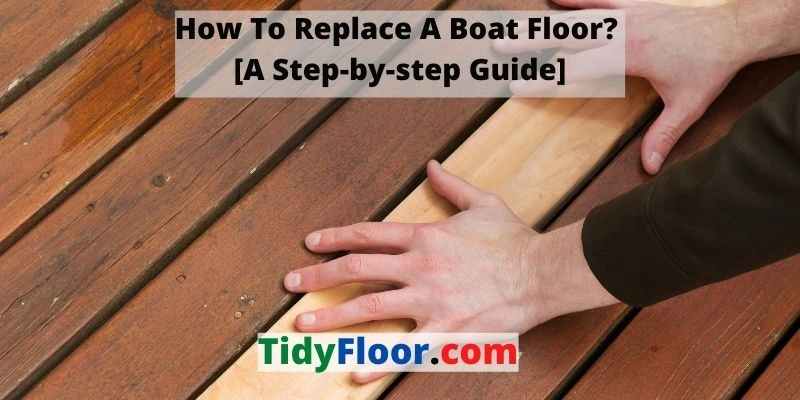
Step 6: Install The New Flooring
Now is the turn to install the plywoods that you have prepared. Before you lay them, apply epoxy resin on the deck and let it dry out completely. Epoxy resin leaves a waterproof layer on the deck, protecting the plywood flooring from water damage.
Next, drill holes in the spaces where you would fix the plywood. The previous holes help you direct where you need to nail the planks. Also, choose the direction of the planks beforehand. The ideal direction is to go across the length of the boat. Now one by one, lay the plank and nail them. Also, attach the planks with the help of cleats to the starboard and port.
Done with installing plywood planks on the entire deck? If yes, let’s go on to the next steps.
Step 7: Lay A Fiberglass Mat
No matter how durable and water-resistant the flooring is, you need to lay a fiberglass mat on it. Fiberglass sheets are waterproof and protect the flooring and keep it intact. Besides protecting the flooring, it also gives smooth and glossy boat flooring.
After you lay the fiberglass mat flat on the flooring, apply boat floor epoxy resin and seal the flooring. This settles the mat or sheet on the flooring. Let it dry out completely, and now the flooring is ready.
Note that you should lay two or three layers of fiberglass matting for the best result.
Step 8: Reinstall The Items You Have Removed
Now set all the cables and materials you have removed from the deck before starting the project. Be careful while connecting the cables and machines. You may take help from an expert.
Quick tip! While disconnecting the cables before the project, you can note which part was attached to which and which machine. This will help you to reinstall the machines easily.
How To Replace A Rotted Boat Floor
To replace a rotted boat floor, follow these steps: First, prioritize safety by turning off all power sources and ensuring proper ventilation. Remove any fixtures, seats, or equipment covering the floor. Carefully cut away the old rotted floor, taking care not to damage the boat’s structural components.
Thoroughly remove all decayed wood. Inspect the subfloor, repairing any damaged areas, and ensuring it’s clean and dry. Cut marine-grade plywood to fit the area, coat it with epoxy resin, and secure it to the subfloor with marine-grade adhesive and stainless steel screws.
Seal the edges and seams with marine-grade sealant, replace fixtures and equipment, and perform a final inspection to confirm the new floor’s stability and the proper securement of all components.
How To Replace A Fibreglass Boat Floor
replacing plywood floor in boat fiberglass boat floor involves several key steps. Safety is paramount, so start by turning off power sources and ensuring proper ventilation. Remove any fixtures, seats, or equipment that cover the existing floor.
Carefully cut the old fiberglass floor into manageable sections for easier removal, taking care not to damage the boat’s structural elements. Examine and repair the subfloor as needed, ensuring it is clean and dry. Install a new floor using marine-grade plywood or composite material, cut to fit the area, and secure it with marine-grade adhesive and stainless steel screws.
Apply a layer of fiberglass mat and resin over the new floor to enhance strength and water resistance. Before reinstalling fixtures and equipment, conduct a final inspection to confirm the new floor’s stability and the proper securement of all components.
How To Replace A Wooden Boat Floor
Replacing a wooden boat floor is a project that requires careful steps. Start by ensuring safety with proper ventilation and turning off all power sources. Remove any fixtures, seats, or equipment covering the existing floor. Carefully take out the old wooden floor, being cautious not to damage the boat’s structural components.
Inspect and repair the subfloor, ensuring it’s clean, dry, and free from rot or damage. Cut marine-grade plywood to fit the area and coat it with epoxy resin, then securely attach it to the subfloor using marine-grade adhesive and stainless steel screws.
Seal the edges and seams with marine-grade sealant to prevent water intrusion. Before reinstalling fixtures and equipment, conduct a final inspection to confirm the new floor’s stability and the proper securement of all components.
How To Replace Floor On A Pontoon Boat
Replacing the floor on a pontoon boat is a substantial undertaking with several key steps. Start by ensuring safety through proper ventilation and disconnecting any power sources. Remove all fixtures, seats, and equipment covering the existing floor. Carefully take out the old floor, being cautious not to damage the boat’s structural components.
Inspect and repair the subfloor, ensuring it’s clean, dry, and free from any rot or damage. Cut marine-grade plywood or composite material to fit the area and secure it to the subfloor using marine-grade adhesive and stainless steel screws. You can choose to install a floor covering like marine-grade carpet or vinyl. Seal the edges and seams with marine-grade sealant to prevent water intrusion.
Conduct a final inspection to ensure the new floor is stable, and then reinstall fixtures and equipment. Due to the complexity of this project, many boat owners opt to have it done by professionals to ensure it’s completed correctly. Always adhere to safety guidelines and consult your boat’s specific manual for any model-specific details.
How To Put A Floor In A Bottom Boat
Putting a floor in a bottom boat involves several steps. First, ensure safety by working in a well-ventilated area. Next, measure the interior of the boat to determine the floor’s size.Cut marine-grade plywood to fit this measurement, ensuring it’s designed for marine use to withstand water exposure.
Place the plywood floor in the boat and secure it to the boat’s ribs or supports using marine-grade screws or bolts. You may want to apply a marine-grade sealant to the edges to prevent water infiltration.If desired, cover the plywood floor with a non-slip marine flooring material.
Always follow safety precautions and consult your boat’s specific manual for any model-specific details.
Frequently Asked Questions:
How To Tell If A Fiberglass Boat Is Rotten?
The fiberglass floor on a boat is sturdy and durable and gives the vessel a beautiful look. But a rotten fiberglass problem on a boat is nothing new and must be replaced as soon as possible. Identifying the rotten fiberglass boat is quite easy. Simply step on the fiberglass floor of the boat to check for rot.
If the transom is soft or movable, it indicates fiberglass boat floor rot. This issue must be addressed immediately as the boat needs to be structurally in a better position.
What Kind Of Plywood Do You Need To Replace the Boat Floor?
Choosing the proper plywood is necessary to accomplish the task of boat floor replacement because not all plywoods are suitable to adapt to marine conditions.
The ideal plywood for boat floor replacement is marine-grade plywood. Marine flooring is crafted especially for adapting to high-moisture conditions and rough weather. It is more durable, compact as well as water-resistant than regular plywood. So you should always go for marine-grade plywood for boat floor replacement.
How To Fix A Soft Spot In Fiberglass Boat Floor?
Soft spots in the fiberglass floor must be fixed as soon as possible. However, fixing the soft spot is quite easy and does not require much time. First, find the soft spot on the boat’s fiberglass floor and sand the affected area. Continue sanding until the damaged spot is completely gone.
After sanding, fill the area with resin-based putty and allow it to cure completely. You will also rely on a fiberglass repair kit for the job. However, replacing the entire fiberglass floor is also a solution if the damage is too severe.
How Much Does It Cost To Replace Boat Floor And Stringers?
Replacing the boat floor and stringers is an excellent way of dealing with boat damage. However, the cost of replacing the wood floor in boats and stringers depends on a wide range of factors. These factors include material quality, boat size, labor costs, etc.
Typically the cost of replacing the boat floor and stringers ranges from $5000 to $10000, depending on the factors. However, the overall price will be significantly lower if you replace the components.
How Much Does Aluminum Boat Floor Replacement Cost?
Replacing the aluminum boat floor becomes necessary in case it is damaged. Not only that, but new boat owners also prefer to replace the flooring material with a new one. The cost of replacing boat floor plywood depends on several factors, including material cost, quality, etc.
The size of the boat and labor costs also play a significant role in the pricing. The cost of replacing the boat floor typically ranges between $1000 to $10000. However, if you DIY an aluminum boat floor, you will only have to pay for the materials and tools.
Can You Use Regular Plywood On the Boat Floor?
Marine plywood is the best material for boat floor replacement. The marine-grade plywood used on boat floorings is sturdy and highly durable. Not only that, but this plywood type also ensures resistance against water and easily adapts to marine conditions.
While regular plywood is also durable, it is not suitable for replacing the boat floor. The reason behind this is that regular plywood can easily be damaged due to water.
How To Do Plywood Boat Floor Replacement?
Replacing the (2) plywood boat floor is quite simple. First, remove all the seats and other components from the floor and disconnect all the electric connections. Remove the old flooring material from the boat and take measurements. Cut the plywood according to the measurements of the floor.
Install the plywood on the floor and secure it properly in place. Apply sealant to protect the boat floor from damage. Lastly, install the seats and all the components, and restore the electric connections.
How Do You Fit A Boat Floor?
In the task of boat replacement, many may think about how they would fit the new flooring in the boat. To crack this, keep following the steps mentioned below:
- Tie a string from the center of the bow straight to the center of the stern;
- With a marker, mark after every 16 inches from the bow to the stern on the string;
- Next, from each mark on the string, measure the width from the string to the starboard. Double the measurement to get the whole width of that portion. This way, keep measuring the width from each 16-inch mark;
- Then measure the length by dividing the bow into three sections- right side, center, and left side. Mark these sections, and from the center of each section, measure the length;
- Transfer the measurements to the plywood board. Then cut and shape according to the measurement;
This is how you can fit the boat flooring.
How Thick Should Plywood Be On The Boat Floor?
The thickness of the plywood on the boat floor matters. It not only decides the weight of the boat but is also responsible for its durability and safety.
To maintain the weight and safety of the boat, ½ to ⅝ inch thick plywood is sufficient. However, you should still install vigorous foaming beneath the plywood, paint it, and seal the flooring. On top of that, fiberglassing plywood flooring is mandatory for added protection and safety. Combining all these materials, the right thickness that will last several years without any disturbance can be achieved.
How Many Layers Of Fiberglass Do You Need For Boat Floor?
Fiberglass flooring is an essential step for protecting the floor. It makes the flooring water-resistant and improves the appearance of the flooring.
But to get the best result, you should install at least two layers of fiberglass sheets. After laying each sheet, seal the floor and let it dry. Paste another layer of fiberglass sheet on it and let the sealant dry out. You can add a layer of fiberglass to the flooring for extra protection. But make sure you lay it finely, so it sits flat on the floor.
What Is The Best Way To Waterproof Plywood Boat Floor?
If replacing the boat flooring with plywood, you must consider its water resistance. To improve its water resistance, you can try out the methods mentioned below:
- Put a layer of epoxy resin on the flooring;
- Lay fiberglass mat on the plywood;
- Paint the plywood planks with oil-based paint;
- Install foaming beneath the plywood flooring;
These are some practical ways to make the plywood flooring on the boat water-resistant and durable.
How Long Does It Take to Replace a Boat Floor?
The time it takes to replace a boat floor can vary significantly based on factors such as the size of the boat, the complexity of the project, and your level of expertise. For a smaller boat with a simple floor replacement, it may take a skilled individual anywhere from a few days to a week.
Larger boats with more intricate designs can take several weeks or even months to complete. Additionally, curing times for adhesives and sealants should be considered. It’s essential not to rush the process, as proper preparation and meticulous work are crucial to ensure the new floor is secure and watertight.
If you’re unsure about the timeframe, consulting a professional or referring to your boat’s manual can provide more accurate estimates.
How Hard Is It To Replace a Boat Floor?
Replacing a boat floor can be a challenging and labor-intensive project, especially for individuals with limited experience in carpentry or boat repair. The difficulty level varies depending on the boat’s size and design.
Smaller boats with straightforward layouts are more manageable, while larger vessels with complex structures can be quite challenging. It involves tasks like precise measuring, cutting, and fitting marine-grade plywood, securing it properly, and sealing edges to prevent water intrusion.
It’s important to follow safety guidelines, have the right tools, and be prepared for unexpected issues. For those with little experience, seeking professional help or comprehensive guidance is advisable to ensure the job is done correctly.
What Is The Best Material To Replace a Boat Floor?
The best material to replace a boat floor is marine-grade plywood or composite decking. Marine-grade plywood is specifically designed for water environments, making it highly resistant to moisture, rot, and delamination.
It provides stability and durability while being relatively lightweight. Composite decking materials are also an excellent choice, as they are engineered to resist water damage, UV exposure, and provide non-slip surfaces. They are low-maintenance and often come with warranties.
It’s important to choose materials specifically labeled as suitable for marine use to ensure longevity and safety. Always consult your boat’s manual or a professional for guidance on the best material for your specific boat model and usage.
What Can I Use To Replace a Boat Floor?
When replacing a boat floor, you can use various materials, but the most common choices are marine-grade plywood, composite decking, or fiberglass. Marine-grade plywood is a popular option due to its resistance to moisture and rot. Composite decking materials, designed for outdoor use, offer durability, UV resistance, and low maintenance.
Fiberglass is another option, often used for its lightweight and waterproof qualities, making it suitable for smaller boats. The choice depends on your boat’s size, your budget, and the specific demands of your boating activities.
It’s crucial to select materials labeled for marine use to ensure longevity and safety. Always consult your boat’s manual or a professional for guidance on the best material for your specific boat model and usage.
What Kind Of Plywood To Use On A Boat Floor?
The best plywood to use on a boat floor is marine-grade plywood. Marine-grade plywood is specifically designed for use in water environments, making it highly resistant to moisture, rot, and delamination.
It is constructed with waterproof glue and typically uses durable wood species like Douglas fir or mahogany. The layers are void-free to prevent moisture from penetrating the core. Marine-grade plywood comes in various thicknesses and sizes to accommodate different boat floor designs.
When replacing a boat floor, it’s crucial to choose plywood that is labeled as suitable for marine use to ensure longevity and safety on the water.
Final Thoughts:
I have included all the details of installing a new floor by replacing the old boat flooring. I have answered some additional questions, too, for your convenience. Now that the confusion and queries are cleared out, you can proceed with replacing the boat flooring.
Good luck with installing new boat flooring!
References
- How to Replace Boat Floor? – In 5 Simplest Steps. (2023, January 5). Kayak Paddling. Retrieved January 6, 2023, from https://www.kayakpaddling.net/how-to-replace-boat-floor/
- Shantz, J. (2022, May 25). The Complete Guide To Replacing Boat Flooring. Boating Guide. Retrieved January 6, 2023, from https://boating.guide/the-complete-guide-to-replacing-boat-flooring/
This has been very helpful. I do have one question before glossing the boat floor how do I seal or fill any small gaps between the hull and the new wood floor?
To seal or fill small gaps between the hull and the new wood floor, you can use a marine-grade sealant or adhesive that is specifically designed for use in boats. Here are the steps to follow:
Clean the area: Use a marine-grade cleaner to clean the area between the hull and the new wood floor. This will remove any dirt, debris, or old sealant that may be present.
Prepare the sealant: Follow the manufacturer’s instructions to prepare the sealant or adhesive.
Apply the sealant: Apply the sealant or adhesive to the gap using a caulking gun or other suitable applicator. Make sure to apply enough sealant to fill the gap completely.
Smooth the sealant: Use a sealant smoothing tool or your finger to smooth the sealant and ensure that it is evenly distributed.
Let it cure: Allow the sealant to cure completely before walking on the new wood floor or exposing it to water. The curing time will vary depending on the type of sealant or adhesive used, so check the manufacturer’s instructions.
Hopefully, you are now clear. Thanks